Living in San Francisco since Milla is four years old, we try to honor German traditions – and one of my favorite celebrations as a child was the lantern procession on St. Martin’s Day. Last year Milla crafted a leaf lantern for our lantern walk. This lantern is also a beautiful decoration for your home and a fun fall project to do with your kids. You can see how we did it here – including all the traps we fell into!
Upfront a little bit more about St. Martin’s Day: In the evening of November 11th there are lantern processions all over Germany and many other European countries, dedicated to St. Martin of Tours. The Roman legionary who was baptized as an adult and became a monk was known as a friend of the children and patron of the poor. The most famous legend concerning him was that he had once saved a homeless person from freezing to death by giving him half of his cloak. It is a wonderful experience for children to walk together with their family and friends holding their self-made lanterns in the dark, singing St. Martin songs.
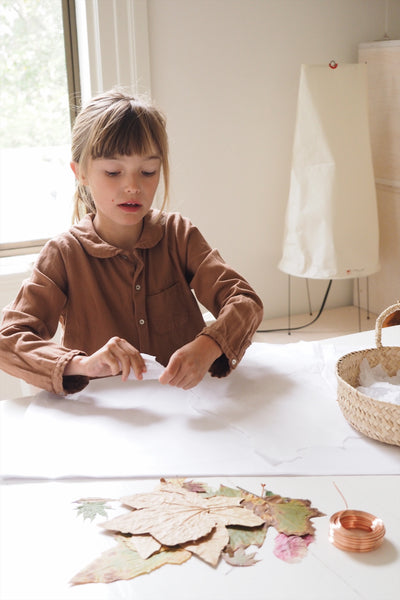
So all you need for the pretty leaf lantern we made is: dried leaves, tissue paper, craft glue, a balloon, a tea candle, copper wire and a stick.
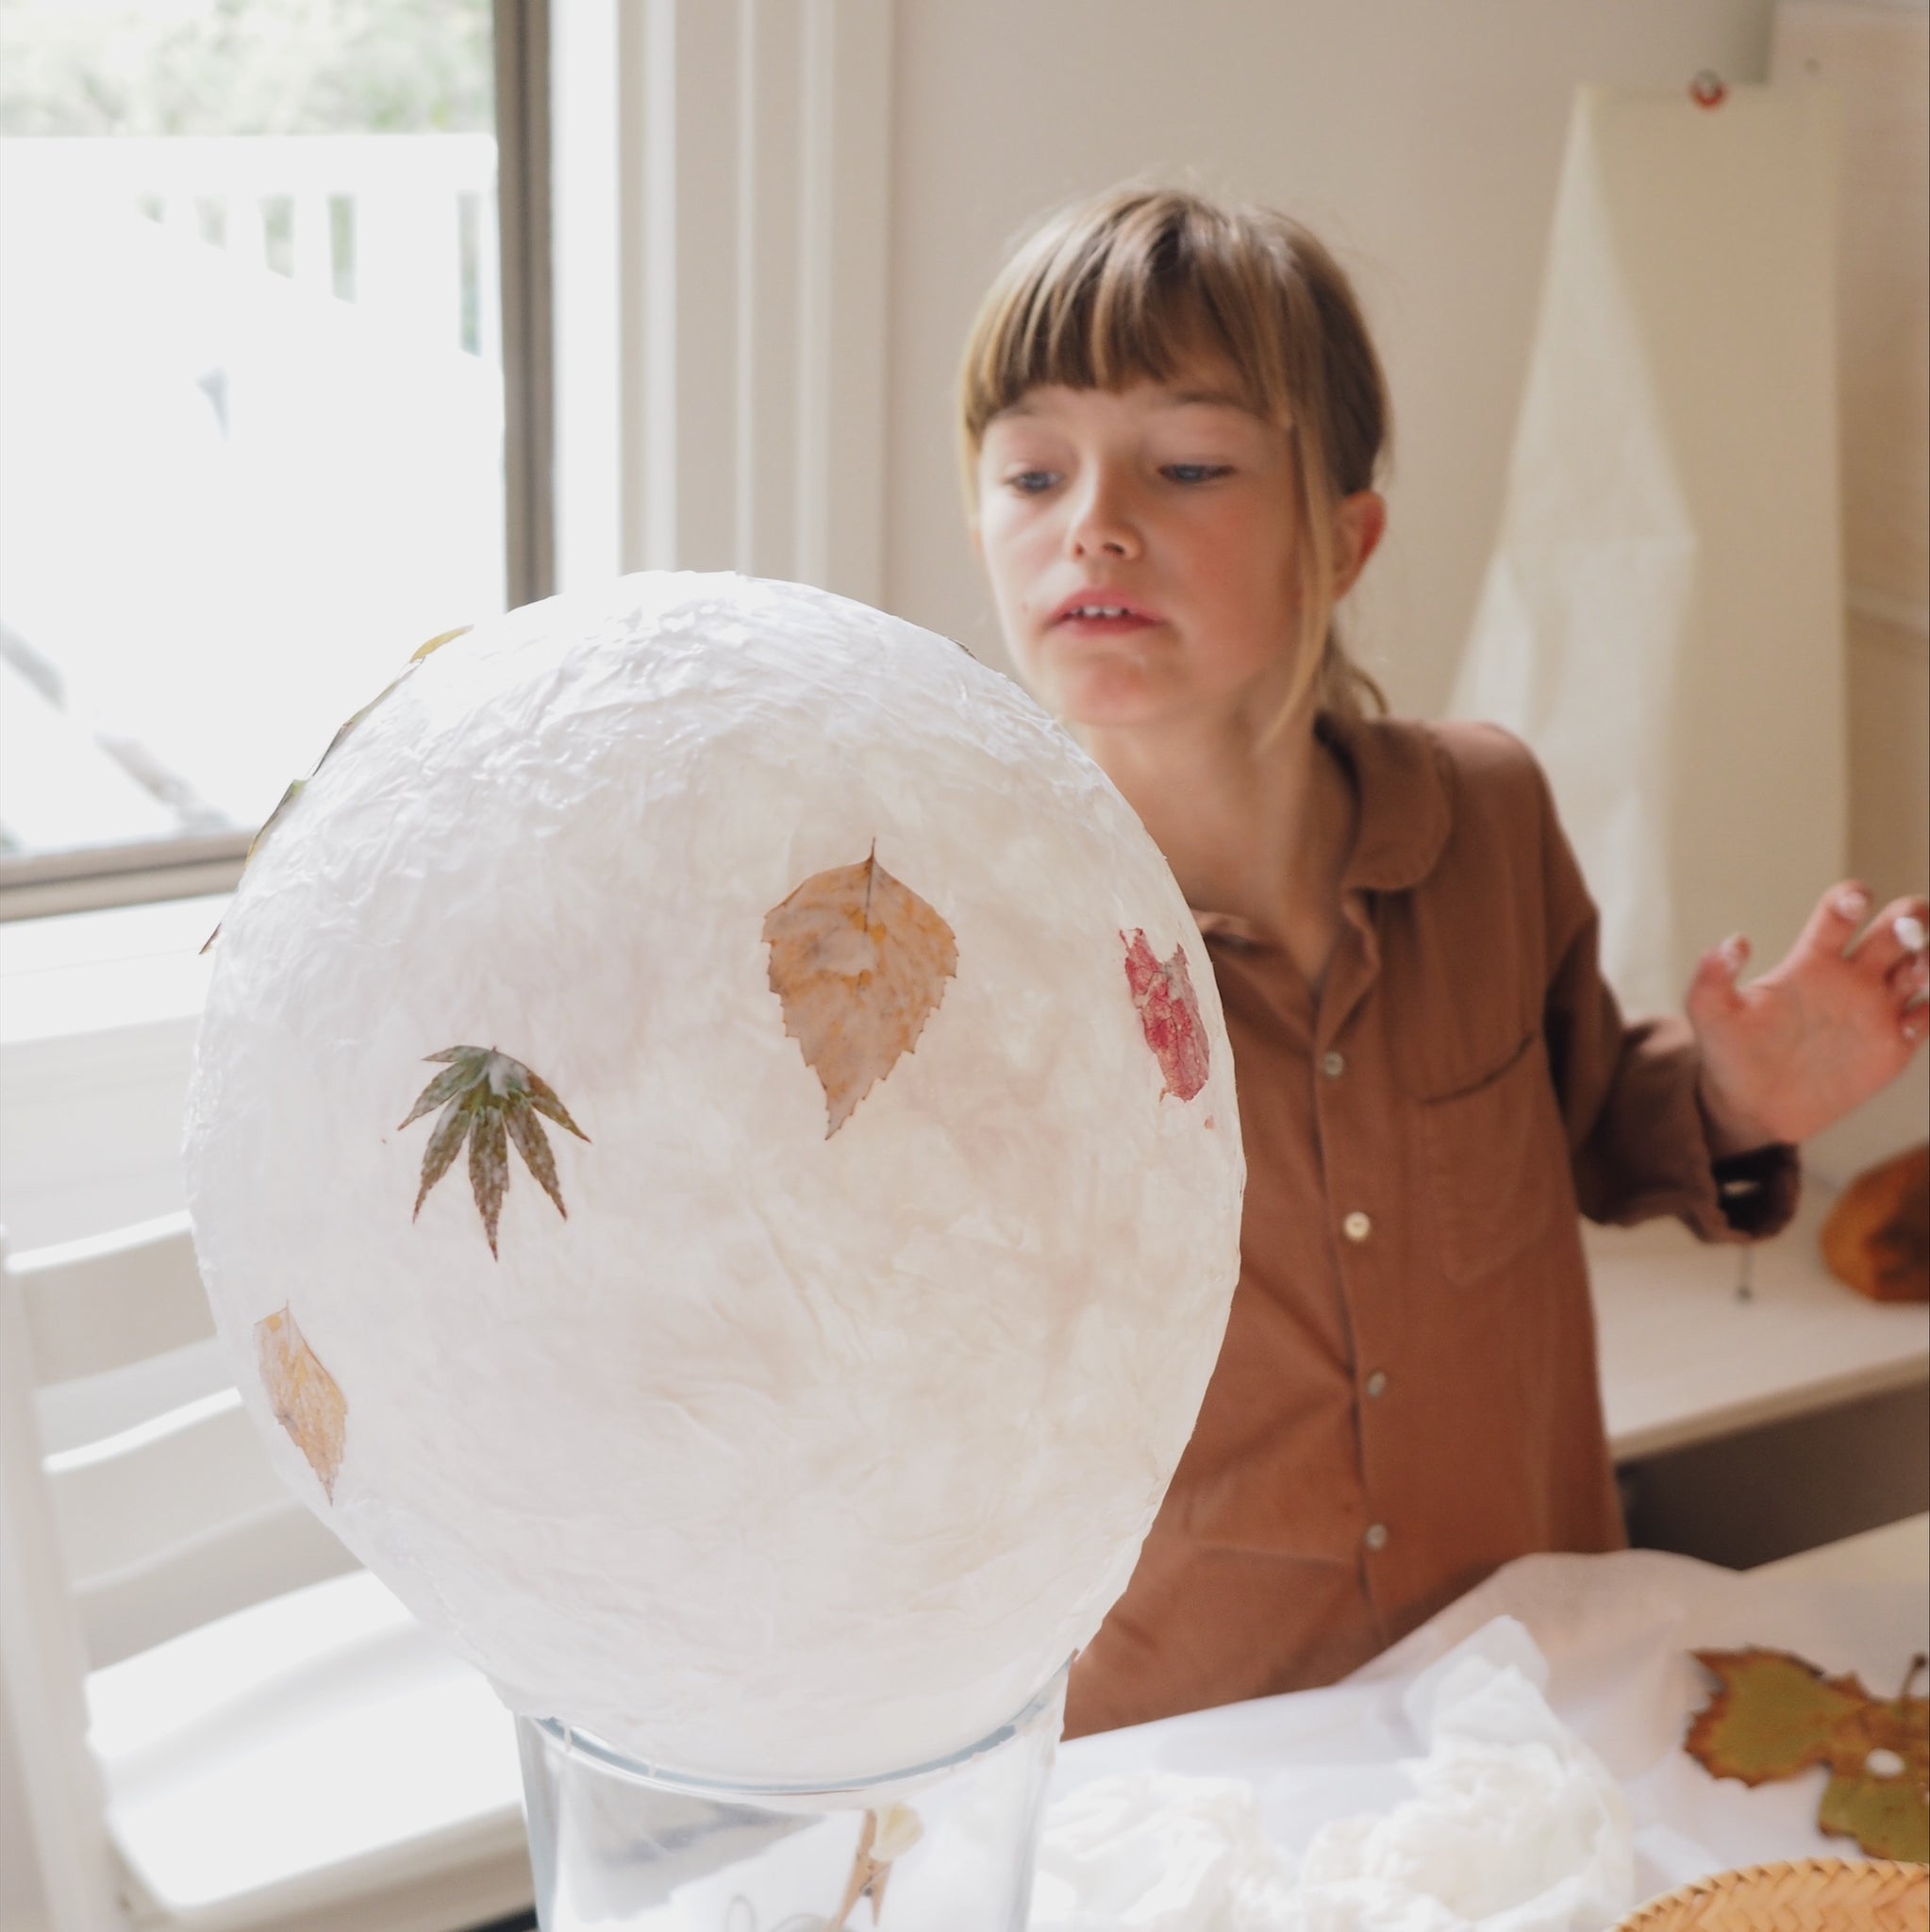
Milla started by ripping the tissue paper in small pieces. Then we blew up the balloon. We mixed the glue with a bit of water, Milla dripped the tissue paper pieces into the glue and stuck them on the balloon, piece by piece until the ballon is fully covered (except for a small opening where the ballon is knotted).

After the first layer of tissue paper Milla added some leaves, also soaked in glue. You should put at least 2 layers of tissuer paper on top of the leaf layer. It takes time. We did two layers - an additional one might have been better as you will see soon! A tricky part is also to find a way to keep the ballon still. (I can not really recommend our 'solution'.)

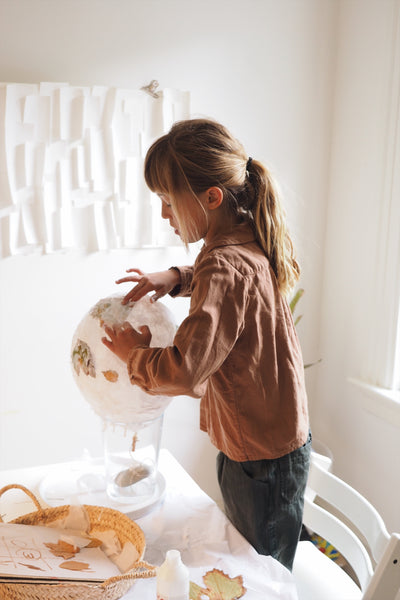
The next step was a difficult one for us: waiting! The covered balloon needs to dry completely. We did wait for one night before Milla popped it. See what happened!
So better to put another layer of tissue and let it dry another day! But also our lantern turned out fine! After the first shock we carefully bulged the balloon/lantern and Milla could smile again!

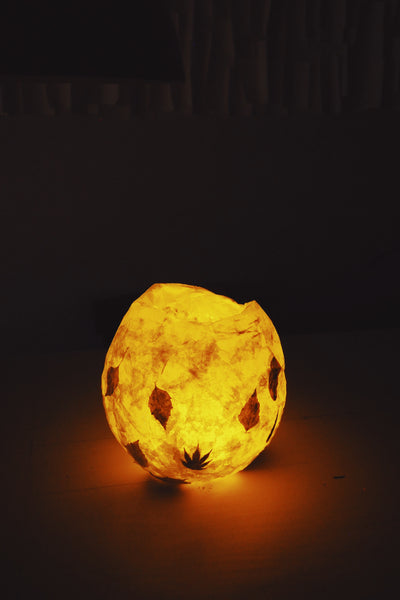
This evening we had the lantern with the candle on our table. It looked very pretty. Our ballon was maybe a bit big though. Next time I would make it smaller, especially if you want to use it as decoration in the home.
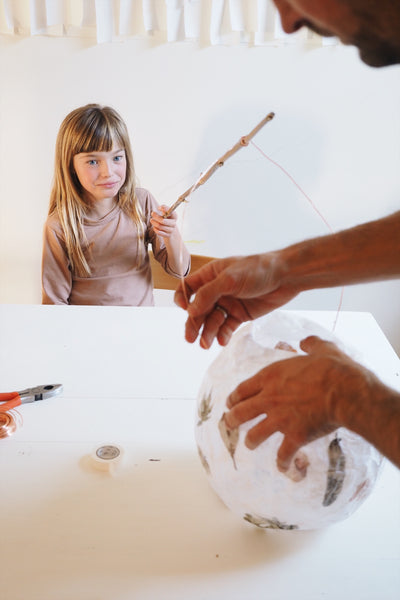
The next day dad helped to attach the copper wire and the stick. We used a bit of white maki tape to strengthen the part where we made the hole for the copper wire, to prevent it from ripping.
Et voilá!
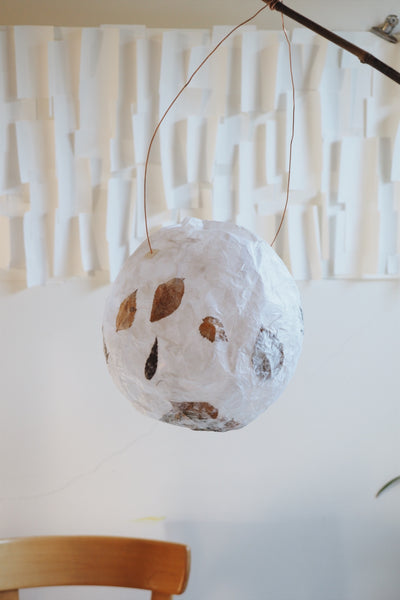
But of course it looked much prettier a few hours later...
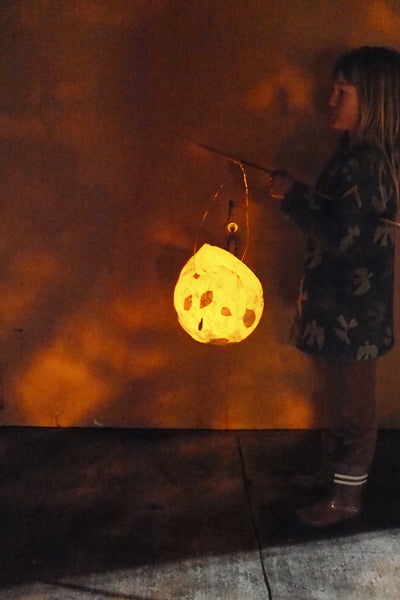
'Ich geh mit meiner Laterne, und meine Laterne mit mir. Dort oben leuchten die Sterne und unten, leuchten wir....'
xx, Birgit
beautiful!